Zipper Pocket A Better Way – Tutorial
Hello, Snazzie People!
Do you make your zipper pockets in a way where if you turned the pocket out you would see the entire zipper? Does that bother you? You might be thinking nobody is going to look that closely at the zipper pocket inside a bag but now that you bring it up, yes it’s starting to bother me.
Most of the tutorials I have found online end up with the same problem, the zipper is exposed. Granted it’s exposed inside a pocket but it’s not that hard to hide that zipper altogether.
This tutorial is to show you an alternative way to insert a zipper pocket. You can use this technique on any project
Materials
- Bag fabric
- Pocket Lining Fabric
- Light Interfacing
- Zipper (1″ 2″ wider than your pock opening. I’m making a 5″ pocket opening so I’m using a 7″ zipper)
- (Optional) double-sided fabric tape
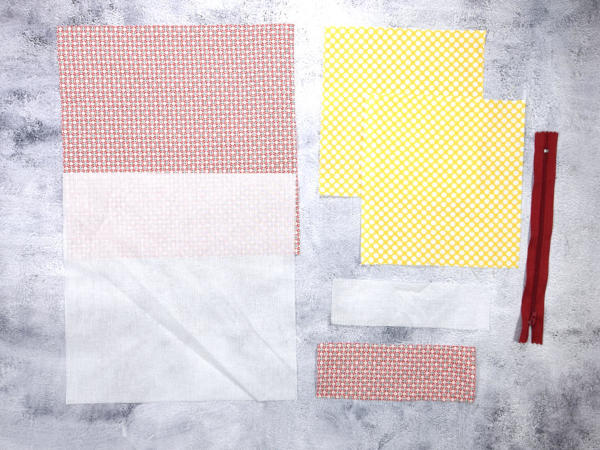
Step 1 – Prepping The Bag Piece
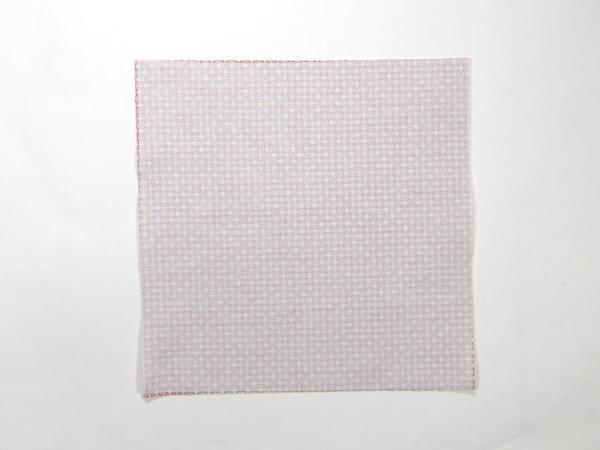
Make sure the area where you are installing the zipper pocket is lined.
For instance, if you are installing the pocket in a purse lining it’s a good idea to interface the lining pieces.
Step 2 – Reinforcing the Zipper Area
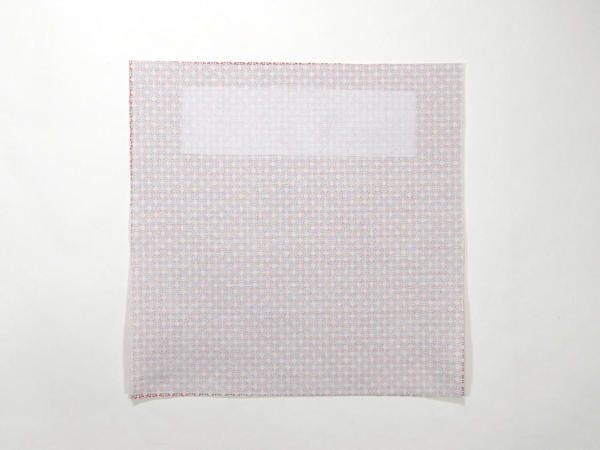
On the back of your piece, apply another piece of interfering about an inch wider and an inch longer than your zipper. This will help reinforce the zipper area. I’m using Pellon Shape-Flex (SF101)
If you want to learn more about interfacing check out my post Mastering Bag-Making Interfacing: Tips and Top Brands.
Step 3 – Marking the Zipper Center
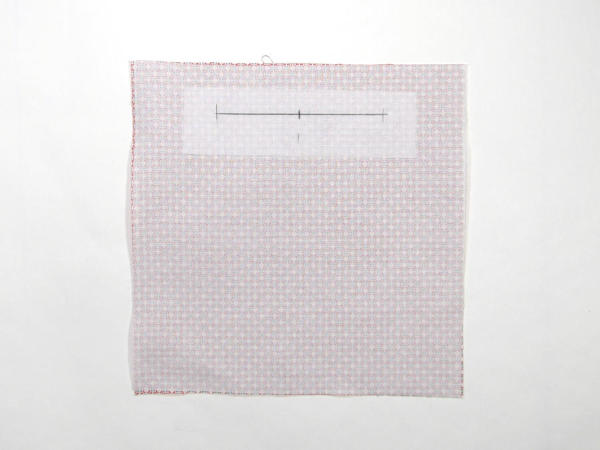
On the back of your piece draw a line marking the center of the zipper.
The best marking tool for this is a pencil. It should show up against the interfacing and it won’t leave ink stains.
I like to start my zipper pockets around 1.25″ down from the top of my bags. You will also want to take into consideration seam allowance. I’m assuming a .5″ seam allowance here so I’m going to mark 1.75″ down from the top.
You also want to make sure your zipper is centered, so find the center of your fabric and mark it, and then measure and mark half the length of your pocket opening size on each side of the center.
Step 4 – Drawing the Zipper Stitching Outline
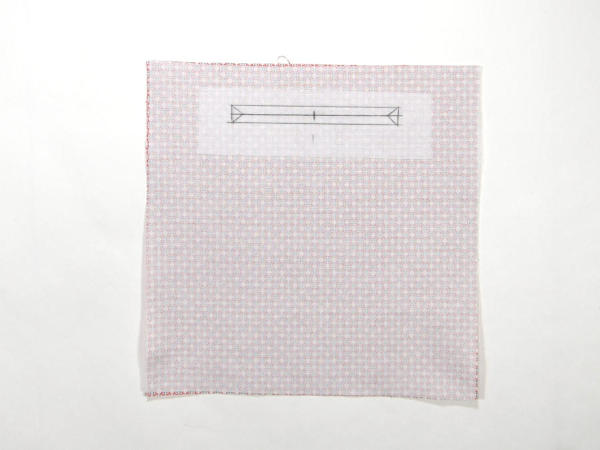
Mark a line parallel 1/4″ above and another line parallel 1/4″ below the first line.
Connect these new lines on the ends to make a rectangle.
Draw small triangles at the ends, inside the rectangle. These will be a guide when we cut the pocket open later.
Step 5 – Adding the Zipper Lining
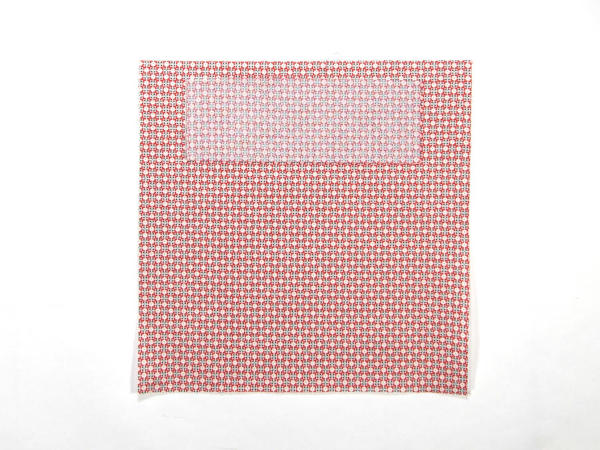
Flip the piece over and place a small piece of fabric, wrong sides together, roughly where your zipper pocket rectangle is.
If needed, secure the fabric in place with pins.
This piece of fabric should be at least 1″ wider and 1″ longer than your zipper pocket opening.
It’s best to use the same color fabric and the piece your pocket is going into but you can also get some neat details by using contrasting fabrics.
Step 6 – Sewing the Zipper Outline
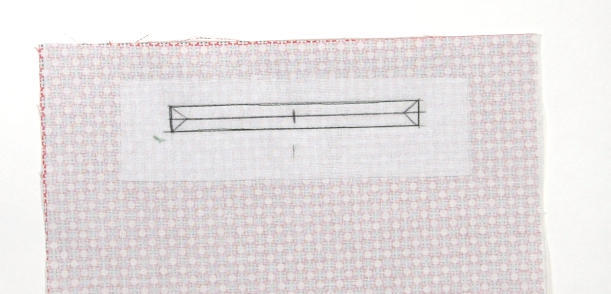

On the sewing machine, sew around the rectangle you drew in the previous steps.
Step 7 – Cutting the Zipper Opening
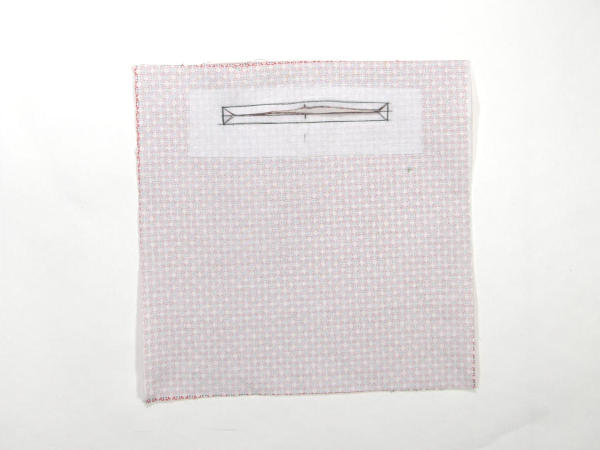
Carefully cut the zipper pocket open.
Cut along the center line to the triangles.
Cut at an angle up to the corners of the rectangle. Try to get as close to the stitches as possible without cutting through the stitches.
Step 8 – Turning in the Zipper Lining
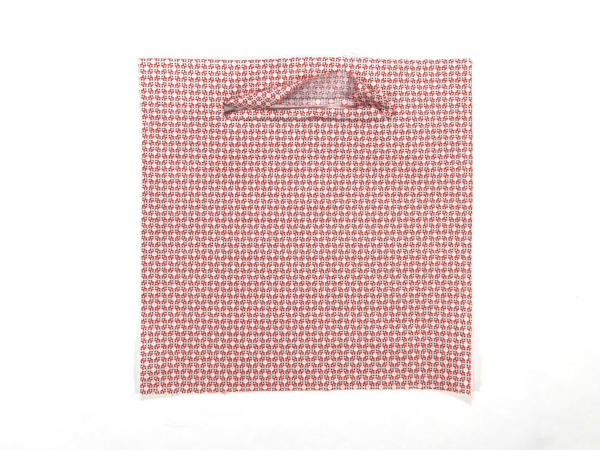
From the right side of the piece push the small fabric through to the back
Step 9 – Pressing the Zipper Opening
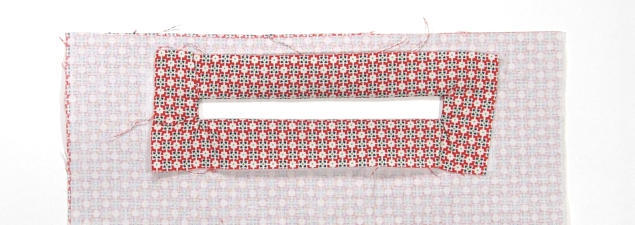
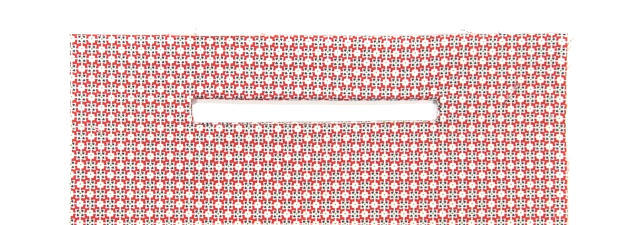
Using an iron press out the rectangle along the stitches.
On to the zipper
Step 10 – Sewing First Pocket Lining Piece to Zipper
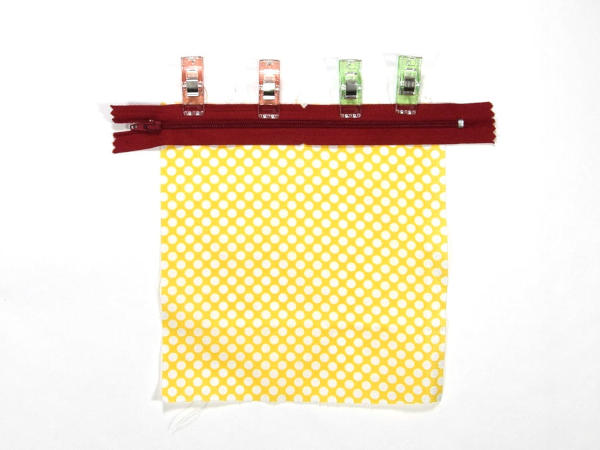
Lay the zipper facing up on top of one piece of the pocket lining fabric also right side facing up
Secure with clips or pins.
Using a zipper foot, sew the zipper to the pocket lining piece with a 1/4″ seam allowance.
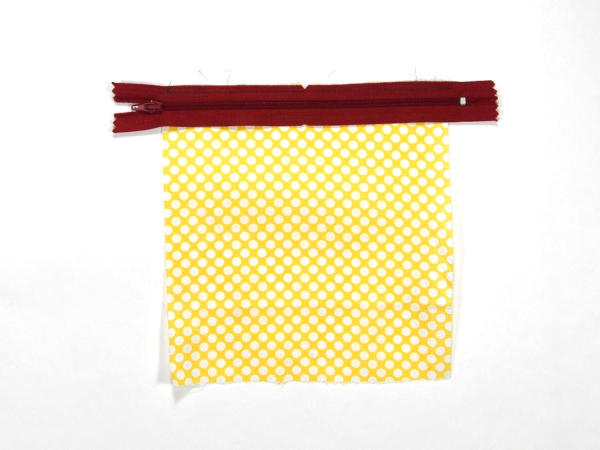
Step 11 – Sewing Second Pocket Lining Piece to Zipper
Similar to the previous step, lay the zipper so the remaining side of the zipper tape matches the top of the remaining piece of pocket lining fabric. Ensure the other pocket lining piece is out of the way.
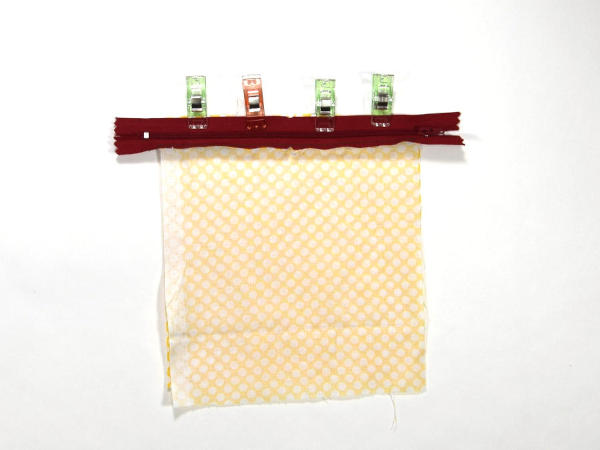
Secure and sew with a zipper foot using a 1/4″ seam allowance.
Step 12 – Press Pocket Lining Pieces Out
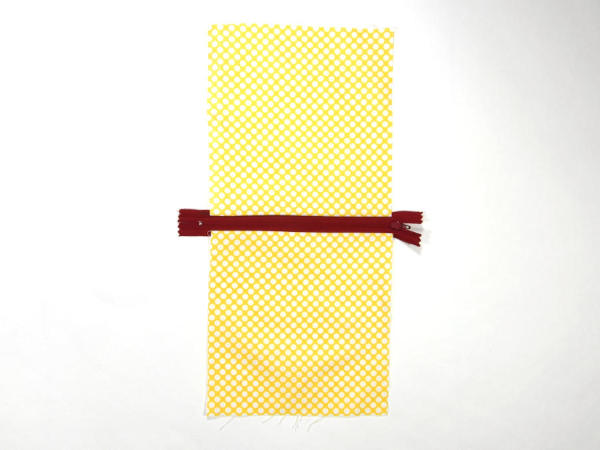
Push out the pocket lining pieces and give them a light press.
Step 13 – (Optional) Tape the Zipper to the Opening
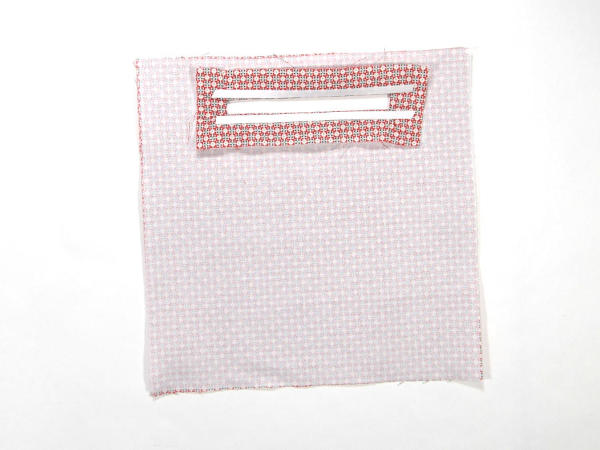
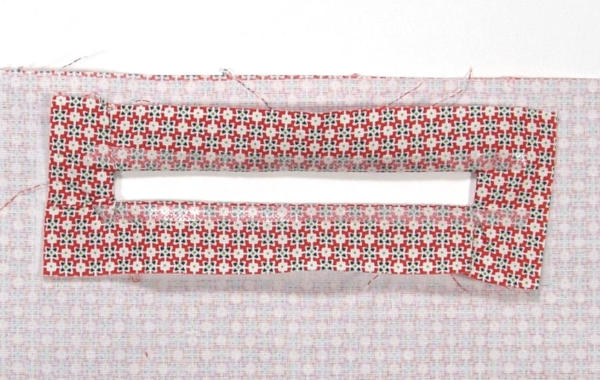
Adhere a piece of double-sided tape along the top and bottom of the back of the zipper pocket opening. This will help keep the zipper in place when sewing.
Step 14 – Place the piece on the zipper.
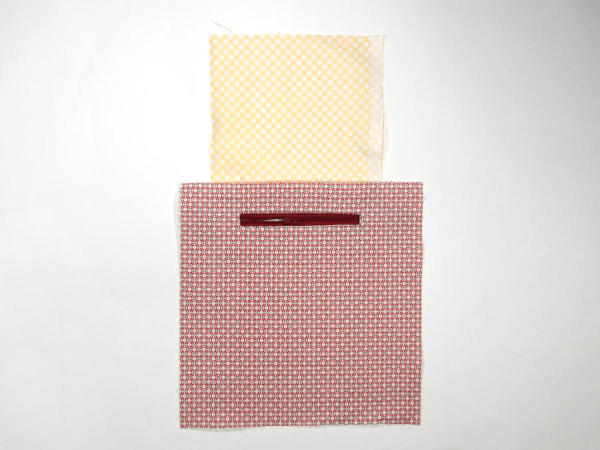
It’s best to do this from the front side so you can line up the zipper and make sure everything is centered.
If you are not using double-sided tape secure it with pins
Step 15 – Sewing Zipper To Piece
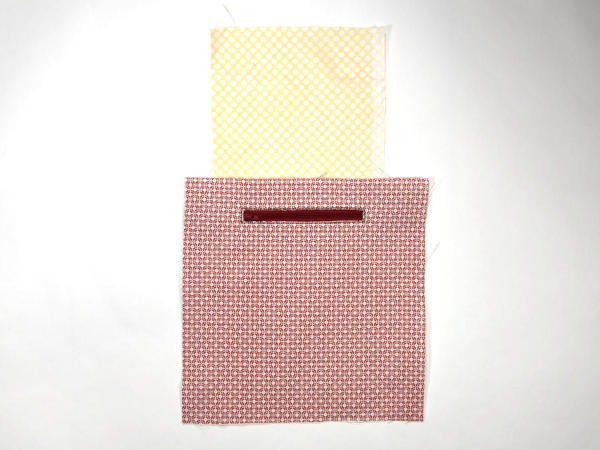
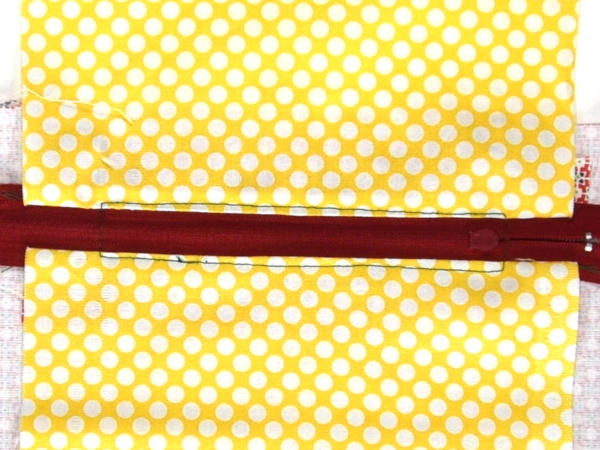
Using a zipper foot, on the front of the pocket opening, sew around the pocket opening rectangle securing the zipper in place.
Step 16 – Closing the Pocket
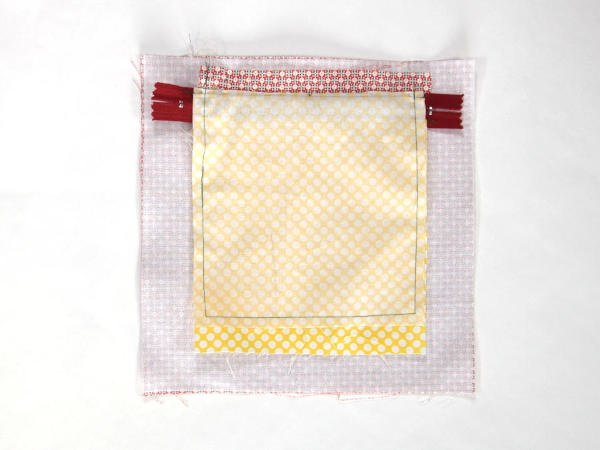
Sew the zipper pocket lining pieces together.
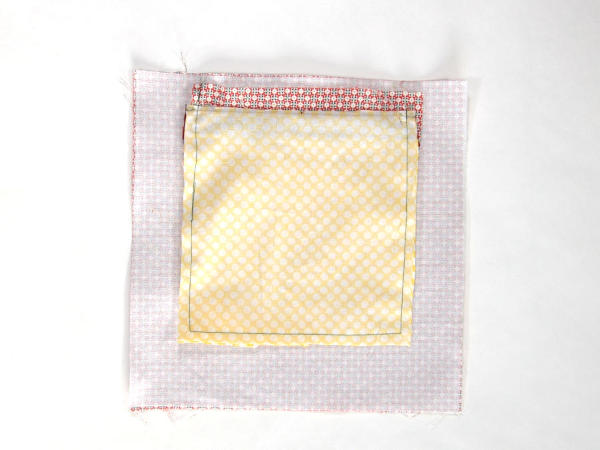
Trim
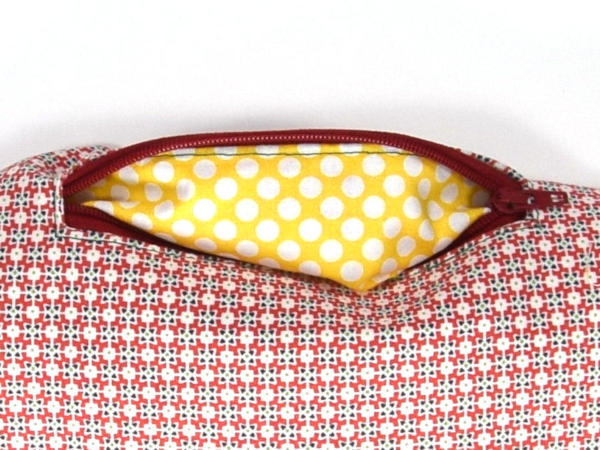
As you can see you now have a neat zipper pocket where the raw edges of the zipper are hidden inside the lining.
So there you go. If anyone ever gets trapped inside your zipper pocket or at least turns it out they will see a nice clean seam and not an exposed zipper.
Let me know if this tutorial was helpful.
Is this going to change the way you do your zipper pockets?
What other kinds of tutorials would you like to see?
Happy Sewing,
Kelly


